Replacing the carpet on your boat can be a daunting task, but with the right tools and knowledge, you can tackle this project like a pro. Say goodbye to worn-out flooring and hello to a fresh new look for your boat with these step-by-step instructions on how to replace boat carpet.
The first step in replacing boat carpet is to remove the old carpet. Start by taking out all the furniture and accessories on the boat to give yourself ample space to work. Use a utility knife to carefully cut and remove the old carpet in sections. Be cautious of any adhesive that may be holding the carpet in place and use a scraper to remove it if necessary.
With the old carpet removed, now is the time to inspect the flooring underneath. Make sure it is clean and in good condition before moving on to the next step. If there are any repairs needed, such as fixing rot or soft spots, now is the time to address them.
Once the flooring is ready, it's time to measure and cut the new carpet. Measure the dimensions of the boat floor and add a few extra inches to ensure you have enough material to work with. Lay the new carpet out flat and use a marker to outline the dimensions needed. Cut the carpet carefully with a sharp utility knife, taking your time to ensure straight lines.
Before laying down the new carpet, it's a good idea to test fit it to make sure it matches the dimensions of the boat floor. Once you are satisfied with the fit, it's time to apply adhesive to the boat floor. Make sure to use a marine-grade adhesive that is designed for use in wet environments.
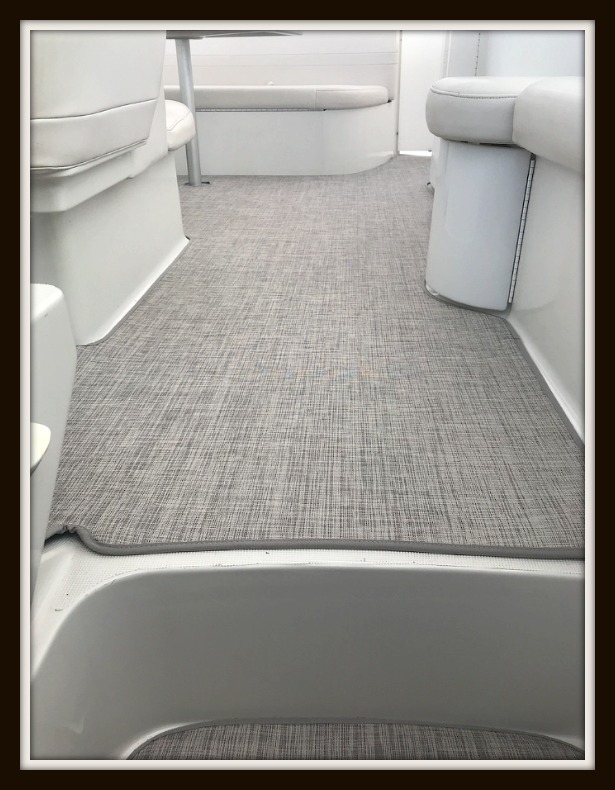
Starting from one end of the boat, carefully lay the new carpet down onto the adhesive. Use a roller to press the carpet into place, making sure there are no air bubbles or wrinkles. Work your way across the boat, pressing the carpet down as you go. If there are any excess edges, trim them with a utility knife for a clean finish.
Once the new carpet is in place, it's time to secure the edges. Use a carpet tucker or trim to tuck the edges of the carpet under any trim or molding along the edges of the boat. This will give a clean and finished look to the installation.
After securing the edges, it's important to let the adhesive dry completely before putting any furniture or accessories back onto the boat. Follow the manufacturer's instructions for drying time, which typically ranges from 24 to 48 hours.
Once the adhesive is dry, you can begin to put the furniture and accessories back onto the boat. Take your time to arrange everything in a way that complements the new carpet and gives your boat a fresh new look.
With the new carpet in place, your boat will look and feel like new again. Say goodbye to worn-out flooring and hello to a boat that is ready for your next adventure on the water. By following these step-by-step instructions, you can replace boat carpet like a pro and enjoy the satisfaction of a job well done.
So, don't wait any longer – get started on replacing your boat carpet today and give your boat the upgrade it deserves. With the right tools and a little bit of patience, you can transform your boat into a stylish and comfortable space that you can enjoy for years to come.
Now that you know how to replace boat carpet like a pro, you can say goodbye to worn-out flooring and hello to a fresh new look for your boat. With these step-by-step instructions, you can tackle this project with confidence and achieve professional results. So, roll up your sleeves and get ready to give your boat the makeover it deserves.